Making Scatter Brushes in Photoshop
While I am using Photoshop CS5, not much has changed in terms of messing with spacing, size dynamics, and jitters[1]. You should be able to apply some of the knowledge you've gained in this tutorial to older versions of Photoshop.
Here, we'll get a brief introduction to working with those parameters to modify spacing and size.
-
First, you want to select the brush that you're working with.
For this example, I was using an incomplete version of the Monthly Romance set.

-
Click on the "Toggle Brush Panel" button

-
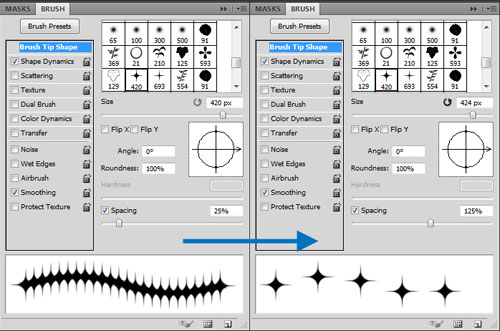
Under "Brush Tip Shape," play around with the spacing option to change the distance between tooltips.
Click to show a larger version of the image

-
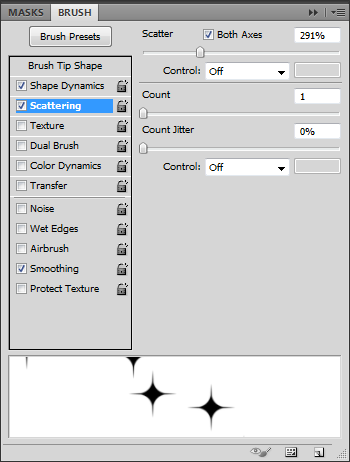
Go to the "Scattering" section, and alter the scatter percentage.
The "Both Axes" option can be used to spread the scattering all over. The "count" option can modify how many shapes show up.

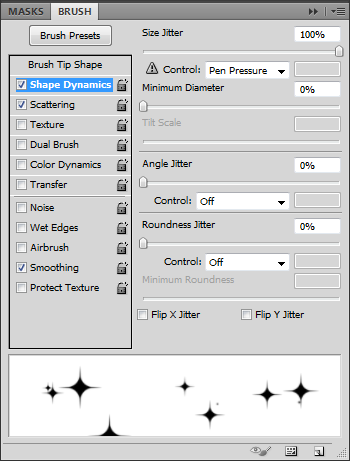
In this example, I was using my mouse, so Pen Pressure shows up as non-functional control, and behaves like "Off" is chosen.
Selecting "Off" turns off control of this parameter, so Photoshop will choose the size randomly.

[1] What is a jitter?
In Photoshop, a jitter would be an option which controls the variation in your tool tip. Jitters insert a bit of randomness into what you're doing.
For example, a size jitter of 50% would indicate that the size of your brush tip could be anywhere from full size to half size of the original brush, and it will switch sizes randomly.


